


|

How to Build a Believable Human Character - Adding Detail to the Body
Step 1 |
|
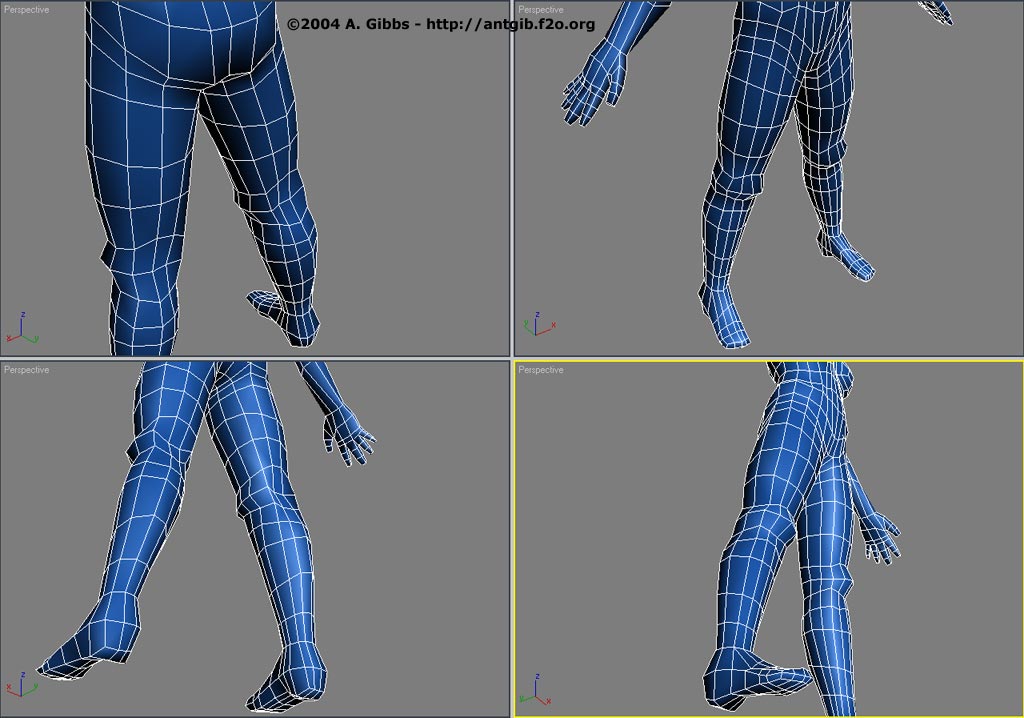
Here we add back those edge runs down the legs and in some cases over the foot. While extra edges may be required later on, both down the legs and the body, for now we will just work with what we already have. A number of new edge loops are however added around both the upper and lower leg and then moved around for a better shape. Make sure to still take into account the overall placement of these loops for animation. For example the couple of extra loops added at the top of the leg are more spaced out at the front and closer together at the back, this is due to the fact that the leg will bend forward and up a very large amount yet will no bend backwards much at all. The knees are still very basic and will need much more detail at a later stage. |
Step 2 |
|
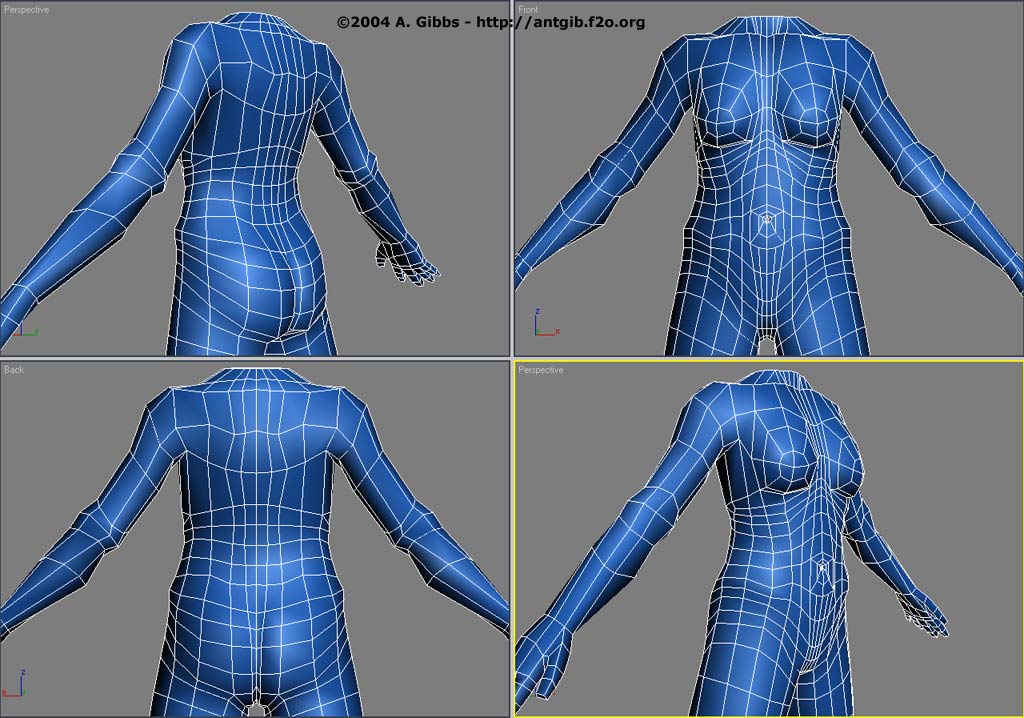
More detail is added to the lower half of the torso by running a number of new edge loops around the body. This has been been used to better define the bottom, the middle area and to add some outline of the rib cage. If your character has/needs more visable ribs, then it is pretty easy to just add a couple more edges and adjust the vertices to pertrude out more. Using the cut tool amoung other tools in the Edit Poly rollouts, a basic belly button was outlined and then extruded inward. Lastly, a new edge was cut all the way down the middle of the back and around over the stomach to end near the belly button. This was mainly used to split the bottom into two halves.
|
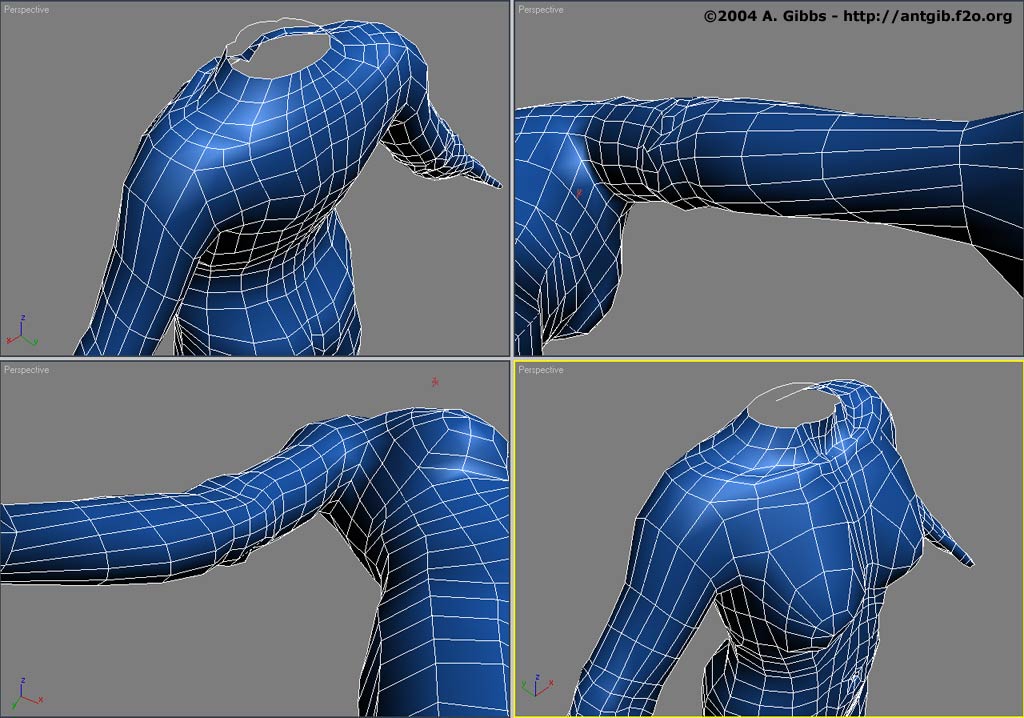
Step 3 |
 |
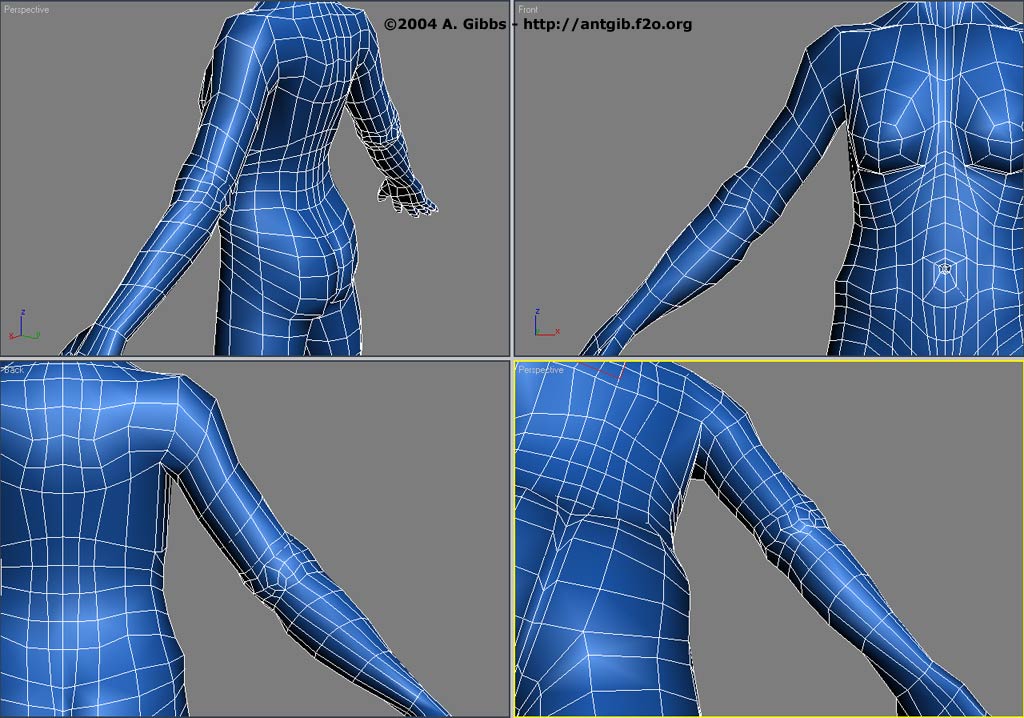
This screen shot shows the extra edges that have been added to the arm. At the moment there is only new detail mostly along the back of the arm and a couple of more edge rings around the arm. This has been used to add more shape and form to the elbow and in same cases, the new edges have been extended down to the hand and across the upper back. You may noticed that one or two cut lines stop in the middle of an edge (like that polygon on the upper arm), for now this is just temporary and as more detail is added to other areas then it is expected that many of these "dead ends" will join up. Currently no new edge runs were added to the front of the arm, this again may well change at later stages but I am trying to keep the model as light as possible for future rendering. |
Step 4 |
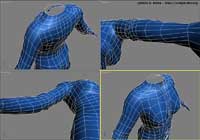 |
Well, as it turned out, things changed pretty fast and in fact new edge runs have now been added along the front of the arm and continued a little bit down the side of the torso. For now these end at the wrist, but when we get to defining more detail on the hand they will be all connected together. More edges and shaping has been done around the neck and shoulder area plus extra detail across the top of the chest used to define the collar bone. |
| |
|
|
|
|