


|

Bio Skin - the skinning tool you always wanted
| Page 1 | 2 |
| Note: All thumbnails will open a new
window with a larger image. |
| One of the most common ways to animate a 3D character,
is to create and animate a low resolution model or skeleton of the
character and use that to drive the movements of your main character.
This process is commonly know as "skinning" and 3ds max has a "skin"
modifier that you apply to your main character mesh and then add the
skeleton (bones) to the modifier.
At this point, the fun begins. As you now have to adjust the influence
that each bone has on the vertices of the main character mesh. This
is a two step process, first each bone as an inner and outer envelope
that can be used to affect any vertices within the envelope. However,
if your character doesn't bend and deform correctly, which is often
the case, then you need to adjust the individual weighting influence
for many vertices on the character mesh.
Now this is all well and good, but as you can imagine it takes
some time to adjust all these vertices, especially on a detailed
character. However, most of the time, your character is an exact
mirror, or near enough, so why would you want to adjust all those
vertex weights on one hand and then have to do it all over again
for the other hand. Unfortunately, while max's "skin" modifier does
have a copy and paste function, it only works on envelopes not vertex
adjustments and even then it does it as a straight copy, not a mirror
from one side of the model to the other.
However, all is not lost, thanks to Kees
Rijnen from Bioware Corp. a script has been created to add this
functionality and been released to
the world. |
| Install |
| Called Bio Skin, this maxscript tool can be downloaded
here (just updated to version 1.5 - max 5+ only, however you may want to keep an eye on www.highend3d.com
for future updates from Kees). After downloading the Bio_Skin.mcr
file, copy it into your 3dsmax folder, under "
/UI/Macroscripts/".
There are then a few ways to run it, but I find the easiest way is
to add a new menu bar item and put it under that, along with a few
other choice tools you may have. If you are not sure how to do this,
then check the on-line help for information on how to customise 3ds
max. |
| Using Bio Skin |
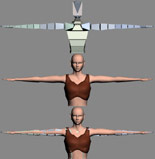
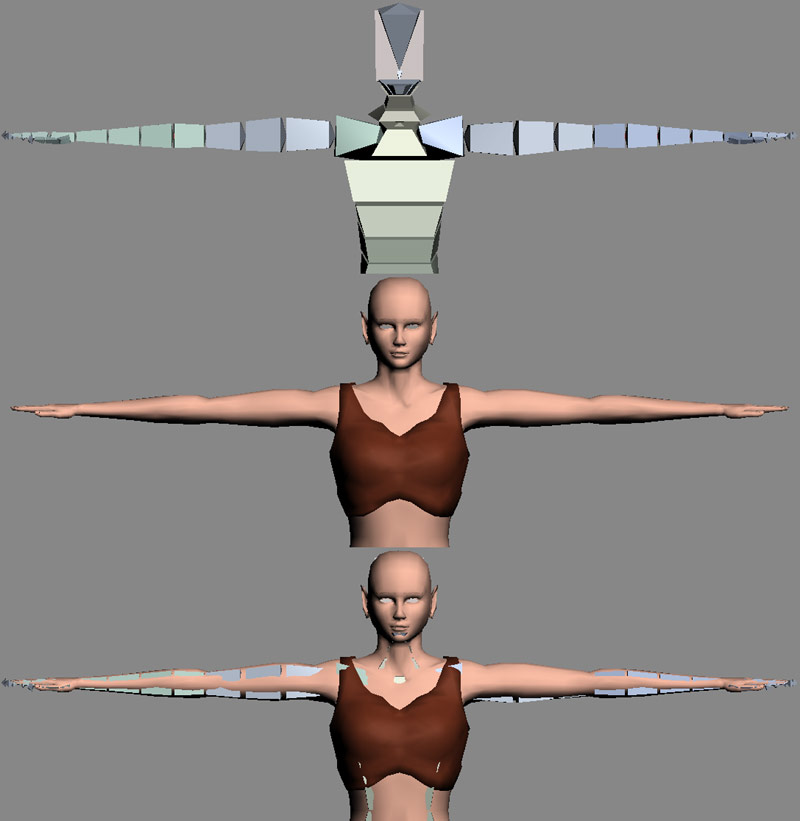
Figure 1 |
This will just be a basic overview of the most used features. I have no plans to cover every single option or go into great detail. However, this will get you started and solve most of your skinning problems in a short period of time.
To start with you need a model and a base skeleton (bones). From the
top of Figure 1, you can see the skeleton
(bones), then the main character mesh and then both together. It helps
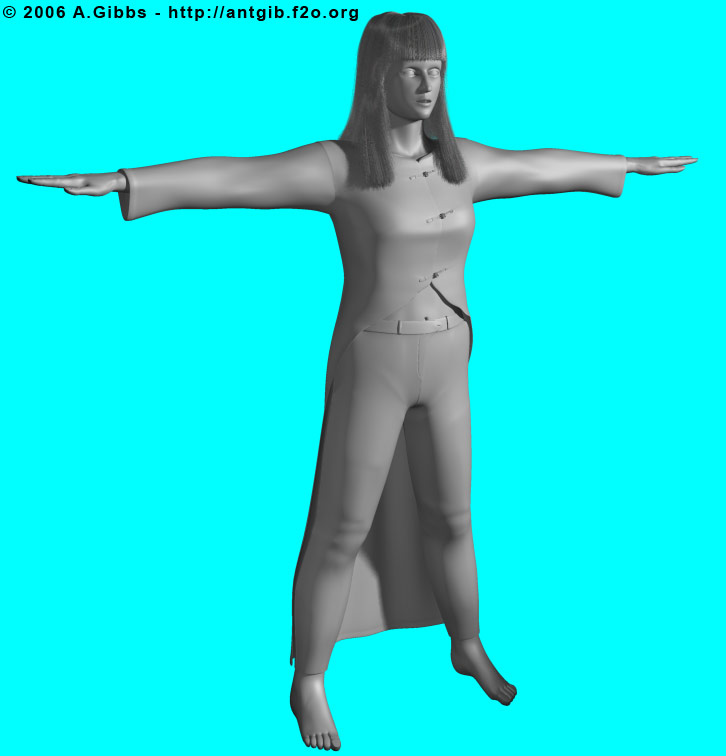
to have created the model so that from the front view, the character
sits dead in the middle of the world axis centre. It's from this middle
line that Bio Skin will use as the mirror plane for your model. However,
if your model isn't centred at the axis origin, then it is possible
to adjust Bio Skin's mirror plane. |
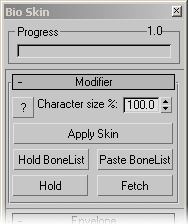
| Modifier |
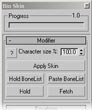
Figure 2
|
Under the modifier rollout are buttons that can be used to control
the initial set-up of the Skin modifier (figure
2). The "Apply Skin" is the same as adding the Skin modifier to
a selected object in the command panel. The other buttons can be used
to save and retrieve the Bones list in the Skin modifier or remove
and then re-apply the Skin modifier to allow changes to the underlying
mesh.
The Character size % value is used when loading in a saved set of envelopes where the bone set-up is the same, but the relative character size between each mesh is different. This can be very useful when skinning a collection of game models that all have the same number and placement of bones but are just larger or smaller characters. Other then that, chances are you will not use this rollout very much.
|
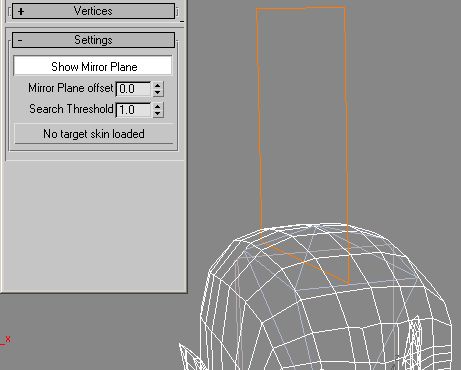
| Settings |
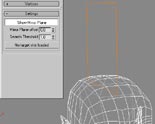
Figure 3
|
The settings rollout is another one that you may only need once
or twice a session. Since once it is set, there is little reason to
make any changes. With you model selected, clicking the "Show Mirror
Plane" will display in the viewport, the centre line that is being
used to mirror the skinning information form one side to the other
(figure 3). When viewing this plane from
the front viewport and it isn't sitting in the exact middle of your
character, use the "Mirror plane offset" spinner to adjust its position
till it is.
The "Search Threshold" spinner may need to be adjust every now and again if Bio Skin is unable to find the opposite bone position due to changes in the size and position of the envelope. However, for the most part the default setting works just fine.
If you happen to be working on a character that is split up into more then one object, like a game model for example. Then clicking on the "No target skin loaded" button and selecting the opposite object, like say a right arm mesh where you are currently working on the left arm mesh, you can mirror all the skinning changes from one mehs object to another.
|
| Page 1 | 2
|
|