


|

How to Build a Believable Human Character - Body Template
Step 6
|
|
Remember when I said that at times we may need to take a step back to fix things? Well, this is one of those times. When I added the 5 cross-sections and started to shape the the leg, it started to become very clear that having 12 sides was going to be a real pain. So, to make things easier, I "removed" 6 of the sides. This was done by first switching to edge sub-object mode and selecting the edges down the leg that I wanted to remove and then using vertex mode to remove the left over vertices. Make sure that you do use the "Remove" button on the edit-poly, and don't just hit delete. |
Step 6a |
|
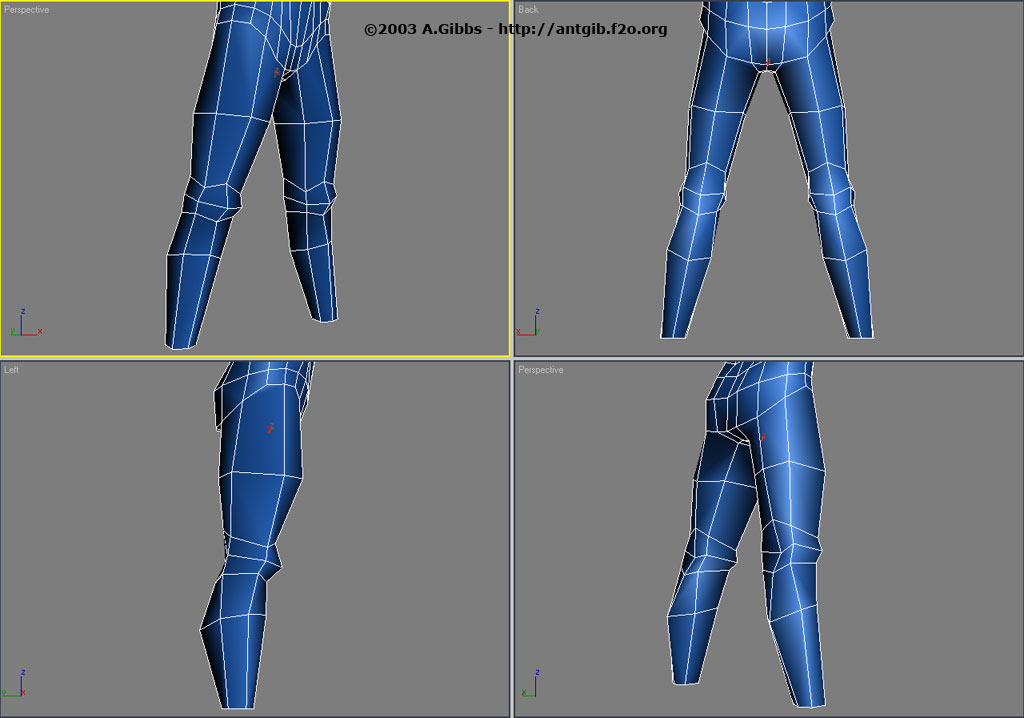
After a few tries, I found the correct edges to remove that allowed for a good flow from the body while letting me define the major planes of the leg. Please refer to the images when selecting the edges to remove. Basically, I kept the edges that would define the middle of both the front and back of the leg and then 4 more on either side, mostly used to define the front and back of the knee. Doing this leaves the largest space on the sides of the leg, both inside and outside. This means that when doing the initial shaping, the maximum width of the leg will not be defined till these edge runs are put back in and pulled out a little. Make sure to turn on meshsmooth every now and then to get a better idea as to how the final shape is looking. Remember that meshsmooth will "shrink" the mesh as it rounds, so what may look wrong in low-poly, then looks right. |
| One thing to note here is the arrangement of the vertices and edges around the knee. This has been done to allow for better mesh deformation when animating the character. Some more information on this can be found here. |
| |
|
|
|
|