


|

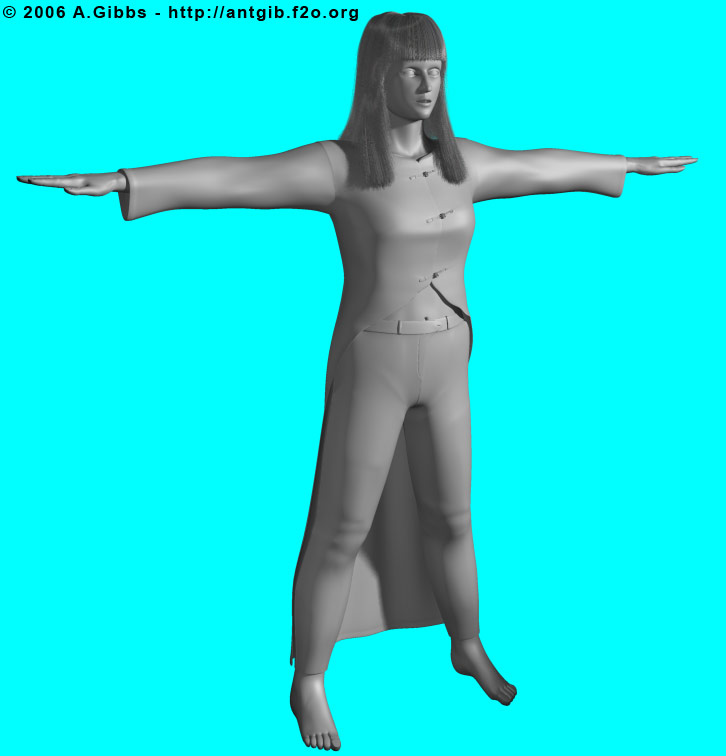
How to Build a Believable Human Character - Hands, Feet and Final
Step 4 |
|
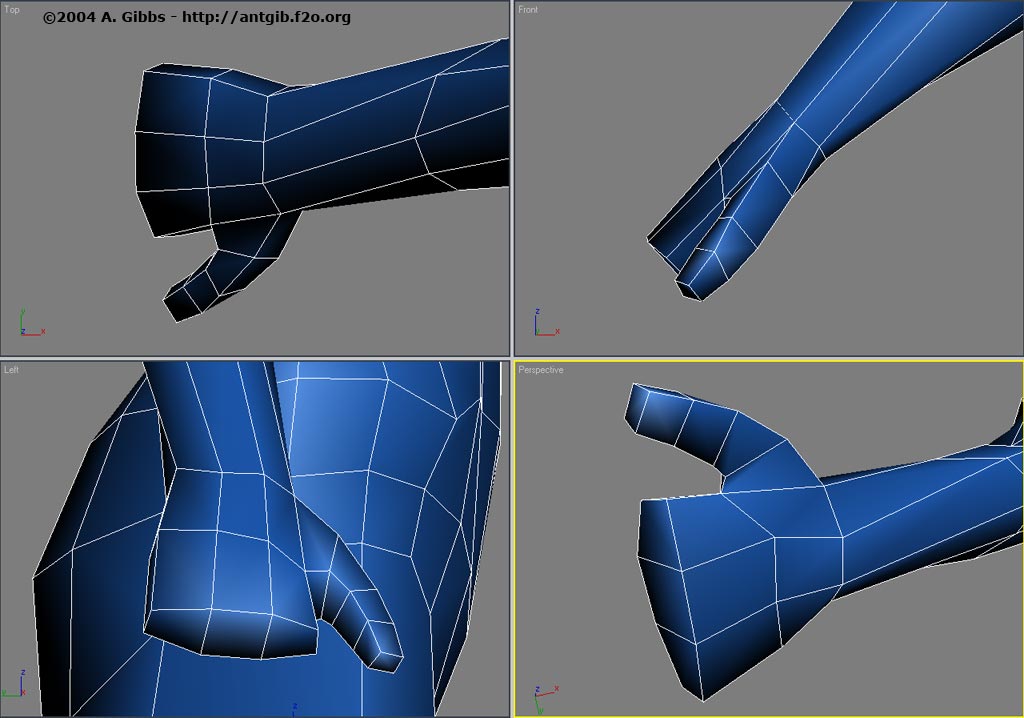
To model the hand, the polygons at the end of the arm are extruded out
to the basic length of the palm. Once that is done, the vertex in the middle was
removed and the vertices along the top and bottom edges are connected to give us 3
polygons at the end of the palm. This will make extruding the fingers much easier. |
Step 5 |
|
A new edge loop is cut through the middle of the palm. This is adjusted
just to make the palm a little more defined and to provide a new polygon down the
side for extruding out the thumb. The thumb is then extruded and shaped as best as
possible using just four flat sides. In the end, the hand is not going to be that
detailed at this stage and once smoothed will mostly likely look very rounded and
out of shape. For now this is OK, since all I really want is the basic outline of
the hand. In the end, each hand is likely to end up with almost as many polygons as
the head and will take some time to get looking just right. |
Step 6 |
 |
To create the fingers, the end polygon was split in two to provide an
extra face for the pinky finger. Then each of the four polygons was extruded out a
little bit in face mode to provide four separate fingers. At this point the
underside of these fingers was then all welded together to create the little bit of
webbing between each finger. To do this, you will need to weld all three points of
the underneath finger, the two from the end of each V line and the vertex at the
base of the V. When that is done on all fingers, the polygon cut tool was used to
put back the edge that was running along the end of the palm. |
| |
|
|
|
|