


|

How to Build a Believable Human Character - Adding Detail to the Head
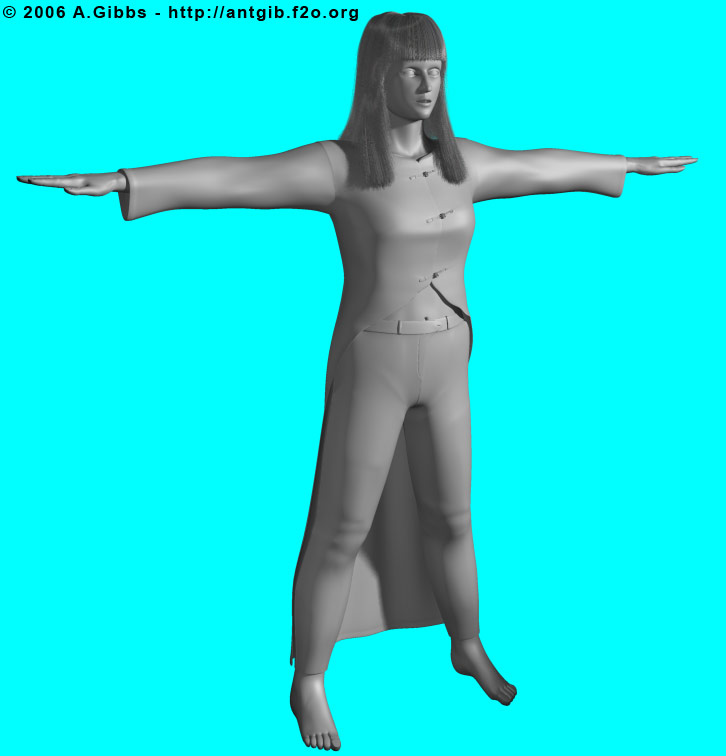
| We are now at the point of adding more detail to the face. While this will stop short of things like forehead wrinkles, which will be covered later, all the major features like ears, nostrils and edge loops for animation will now be done. |
Step 1 |
|
So once you are happy with the full low-poly character, select all the polygons that make up the head and detach back out to a separate object, then hide the body. Remember I said that I was building this up as I went along and one should expect a number of back steps or re-adjustments. Well from the very start you can see that a number of changes have been made to the face. For the most part the major changes have been done around the nose area, this has involved not only adding a number of new edge loops but also moving a range of vertices around. The new edge loops tend to travel either around the nose or from the nose to around the mouth. However note that a new edge was added from the lower eye down to the mouth and also some changes were made around to the side of the chin.
Normally all this middle build up is never seen and the final model makes total sense usually after everything has been half re-modelled. Fortunately edit poly has all the tools for quickly and easily making any changes that are required. |
Step 2 |
|
Here all focus has been on the nose. The side was extruded out and then the front two vertices welded back onto the nose to create the wings. One extra edge was added from the inside eye corner to part way down the side of the nose. This was need to allow for a bit more shaping on the side of the nose. Other then that, most of the vertices were moved around, while checking the mesh in smoothed mode, to try and create a fairly "normal" looking nose. Generally while noses can look different, this is due to position of vertices, as the basic construction is pretty much the same. As we start to add more detail, don't be surprised if triangles start to appear in the model. While quads are preferred, sometimes having all quads just means way too dense a mesh and as long as they appear in areas that won't deform that much then it isn't really a problem. Also, while we may have triangles to start with, as time goes on and more final detail is added, it is possible that these triangles will later go away. |
Step 3 |
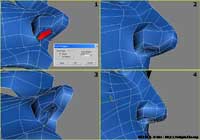 |
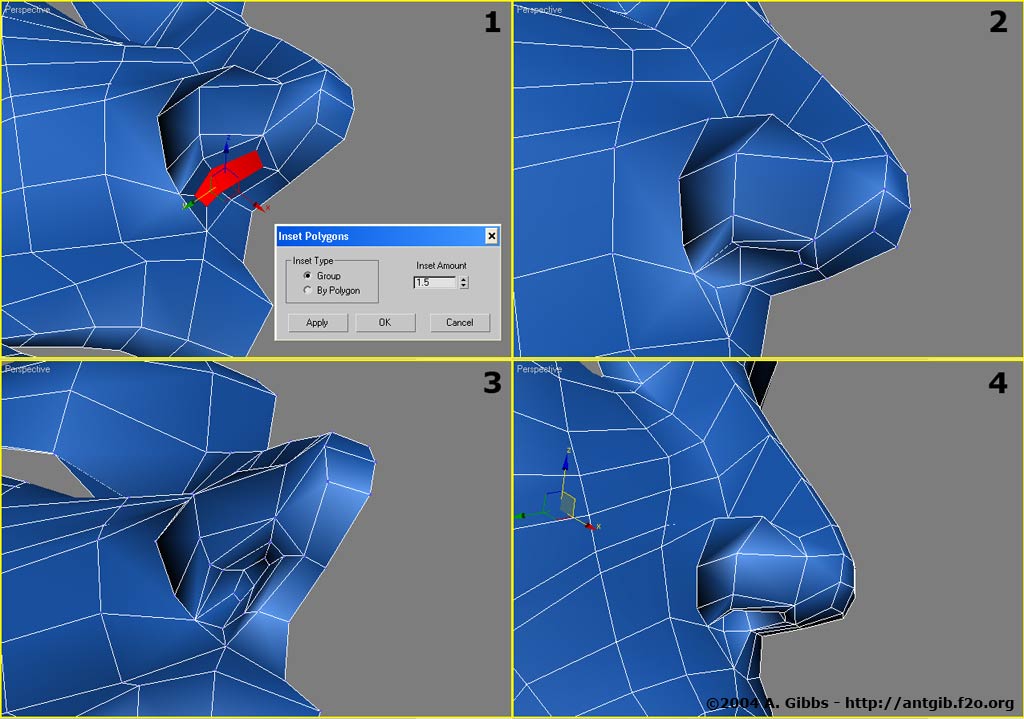
Select the two polygons under the nose and use Inset to add an extra group of polygons for extruding the nostril. Then adjust the vertices, in one case welding a vertex till you have a inside edge. To create the final nostril, select the two most inside polygons and extrude them up into the nose. From there just move around some vertices, checking with meshsmooth, till you get a nose that looks pretty "normal". Make sure to check your photo reference, which you should have been doing all along, right? |
| |
|
|
|
|