Step 7 |
|
First the vertices of both the ear and the head are lined up to make a better
fit. Then the matching polygons on the head are selected and deleted. After that attach
the ear object and then weld all the surrounding vertices together. Once that is all done
make any final adjustments to the mesh for cleaner edge loops and maybe tweak things
around a bit for a better ear shape. |
Step 8 |
|
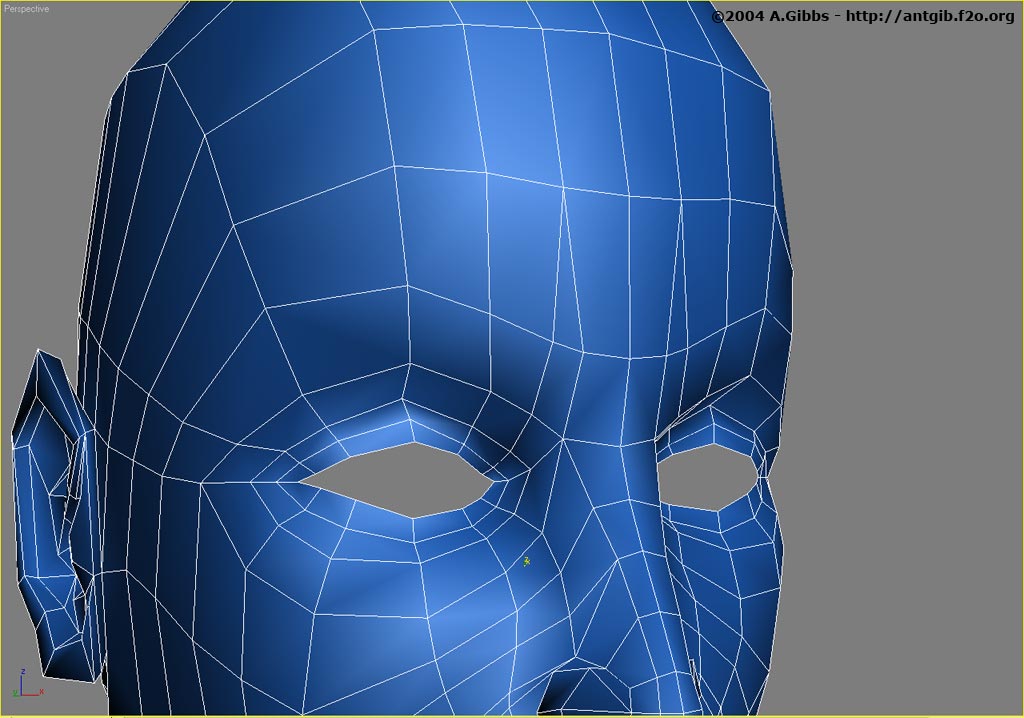
Now it is time to add a bit more detail to the eyes and the brow/forehead area.
First an extra loop was placed around the eye area. The lower half of this was pushed in
a bit, while the top half was pulled out a little to help round out the eye lid. The
other change was a small re-following and extra couple of edges around the bridge of the
nose. This will provide mesh detail for later animation of expressions such as frowning.
|
Step 9 |
 |
Adding some more detail to the eye starts with an extra edge run under the
eye. This cuts from corner to corner and then pulled out a bit to make the small puffy
amount of fat that sits under the eye. Later this can be adjusted to the amount you
required for the final character. If the character is old, then you may need to add
another one or two extra half loops to allow for a more folded puffy look.
Also the inner ring of the eyes was selected and extruded back to put a bit of thickness
onto the eyelids. A new face was also created to add the little inner corner of the eye.
Make sure to use the eyeball sphere to position the eye socket so that there is no gap
between the two. You will need to most check this with the head meshsmoothed out. |
| |
|
|
|