| Page 1 | 2 | 3 |
| Step 4 |
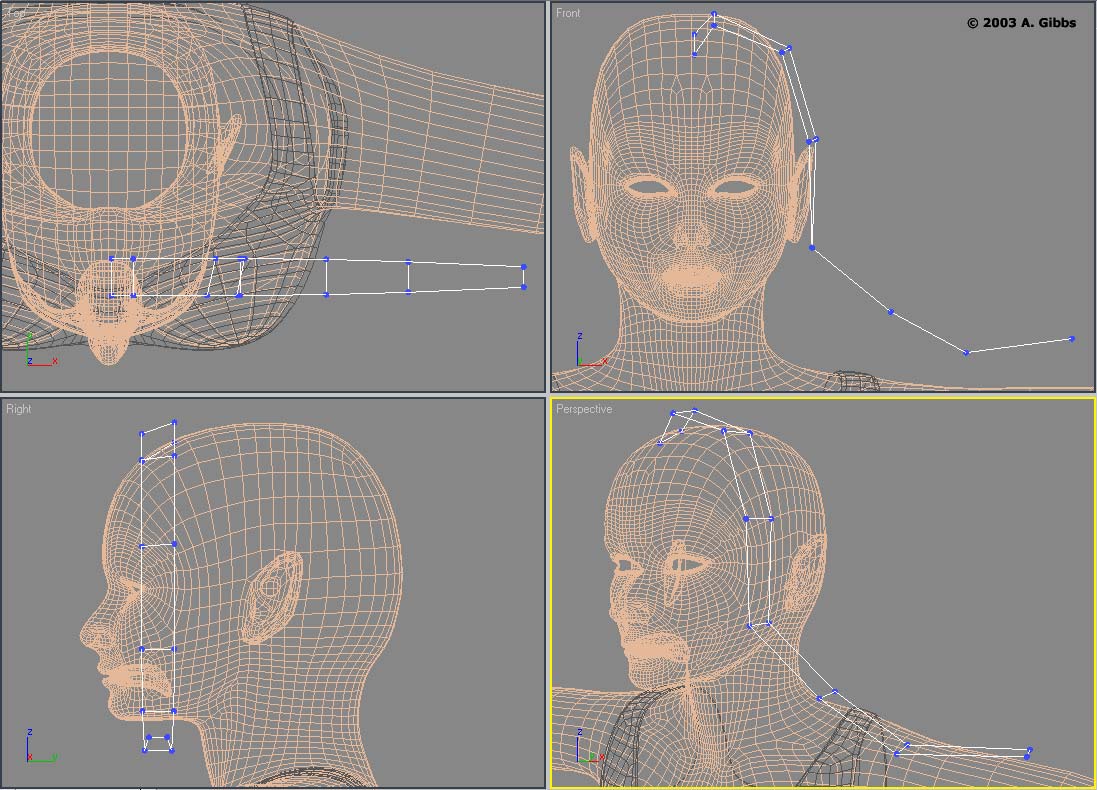
Figure 5 |
In edit vertex mode, rotate/move up the lower segments of the hair
so that it no longer cuts into the body. Try to keep the same basic
length and size of the hair while doing this (figure
5). The reason for this will soon become clear. |
| Step 5 |

Figure 6 |
Remove any meshsmooth modifier and duplicate the hair mesh running
over the top of the head. At the back crown of the head, rotate the
last few hair objects into position. Select one of the hair mesh strips
and attach all the rest to this object. Across the top of the head,
each mesh strip just overlaps each other (figure
6). Re-apply a meshsmooth modifier at 2 iterations and make sure
that the hair doesn't cut into the top area of the head. Except for
the very top end that bends into the scalp, if need be adjust the
vertices to ensure that the start of the hair does in fact come out
of the head. Once you have finished tweaking and are happy with the
general overall placement of the hair mesh, remove the meshsmooth
modifier. |
| Step 6 |

Figure 7 |
Normally you would have to adjust and tweak each hair strip into
place around the head and over the shoulders. That can be a very long
and tedious task, which also tends to result in stiff looking hair.
The solution to this and the reason why we have those mesh strips
all bent up is to use a cloth simulator to give us a more random and
dynamic look. Select the main head mesh (unfreeze if necessary) and
apply the SimClothMod modifier. In the Type rollout, select Deflector
(figure 7). Any other settings
either have no effect or will be set by the modifier that's applied
to the hair mesh. |
| Step 7 |

Figure 8 |
On the hair mesh, which doesn't have any meshsmooth, apply the SimClothMod
modifier. Switch to the vertex mode of SimCloth and select all of
the top 3 rows of vertices on the hair mesh. Click the new button.
Within the Group params rollout, turn the attached check-box on and
then clicking the button next to it select your main head mesh (figure
8). This will fix those vertices and prevent them from moving
during the cloth simulation. All other options can be ignored, as
they will be set in the main SimCloth rollouts. |
| Step 8 |

Figure 9
Figure 10 |
On the top level of the SimCloth modifier set the Type rollout to
cloth. Within the Dynamics rollout the main one to adjust is the Gravity
setting. You want the "hair" to be pulled down fairly quickly but
not at such a strong force that it gets pulled down dead straight
and stops. Under the Integrity rollout the three to look at are Num.
steps, Tightness and Keep speed (figure
9). For the Deflection rollout, make sure that Self-deflect is
checked and adjust the Deflect distance to keep the mesh near too
but not cutting into the main head model. Under the Simulation rollout
the End frame should be somewhere between 20-30 fames to give you
enough simulation to pick a frame with "hair" that you like. For the
Max subdivs a setting of 3 should be enough but it can be increased
to 4 if need be (figure 10). For all these
settings, it is really going to depend on the exact size and scale
of your character and layout of your hair mesh. The above settings
are nothing more then a guide and suggestion as to which setting should
be adjusted first. You will need to experiment and tweak some/all
of those for your scene. |
| |
|
| Page 1 |
2 | 3 |